Baba AweSam welcomes you

Featured

21st Century is all about technology. With the advent of ip networks in the end of last century, all the technologies of yesteryear is being integrated with ip so that the concept of location has blurred. A person living in India can work for a US company. A person sitting in the office can control his home electronics. Data has gone online so that it is accessible from anywhere.

In this blog, we will look into everything related to technology.  I have always been interested in technology since my childhood and thus took up Engineering Studies from Mumbai University. I have built my career around computer networking technology. I am always interested in Computers and Technology and that makes me delve deeper into the subject.

If there is any post you need clarification on or there is some content you would like me to write about, please feel free to contact me. You can follow me on Twitter for interesting quotes about Life. You can view my Linkedin profile for professional skills. You can view my Youtube Channel for project related videos.

Control Input Output of ESP8266 with AJAX

I used to brag about Arduino YUN being the IoT enabler. Then came along super cheap ESP8266 but there was an entry barrier to using it as it seemed like someone who is proficient in Electronics only could make it work. Then came companies like Adafruit, Sparkfun, etc who spoon fed the makers with a version of ESP8266 suitable to their skill level. Prior to this I wanted to experiment with it but never did. Then I procured 3 Adafruit ESP8266 Huzzahs and played with LUA programming. Arduino IDE supporting the ESP8266 was icing on the cake as anyone who has worked on Arduino could now work on ESP8266.

Although I have a degree in Electronics Engineering and have done programming in school and college, I have never worked in that field as I work on Computer Networks. I consider makers to be “Jack of all trade, Master of one”, so rather than learning all technologies associated with making, it is helpful if you get related stuff from people who have already done it. So when I find something which has not been documented and can be helpful to others, I write about it. If you have read my post on “Control Input Output of Arduino Yun with AJAX“, I wish to achieve something similar in this article. This post could not have been possible without the help of “ESP8266 Tutorial” as working with YUN HTML is easier than working with HTML on ESP8266. YUN has a separate HTML file and INO file. ESP8266 is having just one file and to put tons of HTML code in it is difficult. The above mentioned article describes how to easily do that.

Continue reading

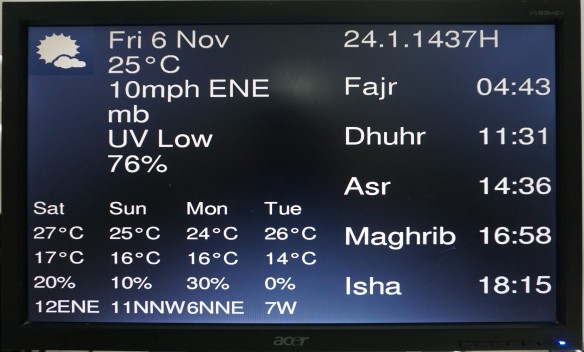
Prayer Times Display using Raspberry Pi

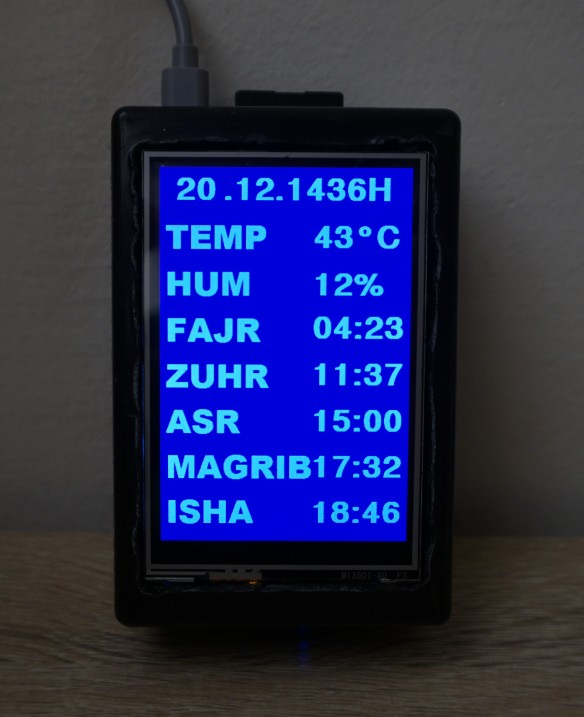
In the previous post, I showed how to make a Raspberry Pi powered Prayer times display using PiTFT. In this post I will show how to make a Raspberry Pi powered Prayer times display using a TV or a monitor as not everyone has PiTFT display.

This project is based on article by Jamie Jackson “Raspberry Pi PiTFT Weather Station” and “Turn your Raspberry Pi into an Azaan/Prayer clock”. You can refer to those for more information. I am just an integrator who puts works of other people together according to my requirement.

Disclaimer: Since the Islamic date and prayer times are based upon calculations, it is very well possible that it may differ from the actual date based on moon sighting. Also, the prayer time can vary from the actual prayer time of the location.

Prayer display monitor

Continue reading

Prayer Times Display using Raspberry Pi and PiTFT

For so long I have wanted a mini display to go with my many Raspberry Pis and recently I got the PiTFT 3.5inch to go with the older Raspberry Pis I have and was searching for projects. I landed upon a project “Raspberry Pi PiTFT Weather Station” by Jamie Jackson and started implementing it. After using the weather display for few days, I did not find it much useful as maybe I am not that much into weather. At the same time when I was searching for projects for the PiTFT, I was also searching for ways to sound alarm at the 5 daily prayer times. This is when it clicked me to use the PiTFT to display prayer times. Since the timing for the 5 daily prayer changes every day and changes from location to location, I referred to “Turn your Raspberry Pi into an Azaan/Prayer clock” for the code. In this article, I will show you the procedure how I completed this project. There is lots of room for improvement in this project but I am limited to the knowledge I have of programming. For more information, you can refer to the links above.

PiTFT

Continue reading

Web Controlled Power Strip using Arduino Yun and Yaler

With Data becoming a major Asset in the Internet generation, it has been stored at locations called Data Centers. Managing the equipments which hold the Data is simple as they are accessible over the Internet. If you are aware of how electronic peripherals work esp. related to computers, you will know that every once in a while they malfunction and need to be rebooted. The problem is that in most cases these devices don’t respond so rebooting them in a conventional way is not possible. The only way to restart them would be power cycling the device. This would not be much problem if you have a manned Data Center or you have remote hands and eyes support. The problem is when you have a malfunctioning equipment at a place where there is no one to look after it. At such times, an IP PDU (Internet Protocol Power Distribution Unit) can be very helpful. This is a Power Strip which you can control over the Internet to power cycle devices plugged into it. In this article, we will look into how to use an Arduino YUN to make an IP PDU aka IP Power strip aka IP Power extension. The reason I am making this is because with Arduino YUN “I have got the Power”.

Continue reading

Arduino YUN powered Home Surveillance Rover

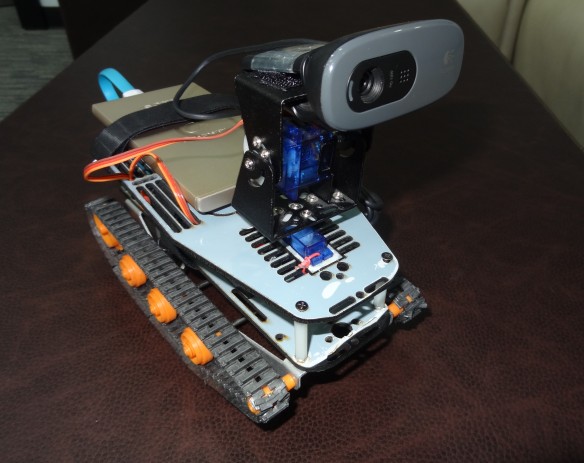
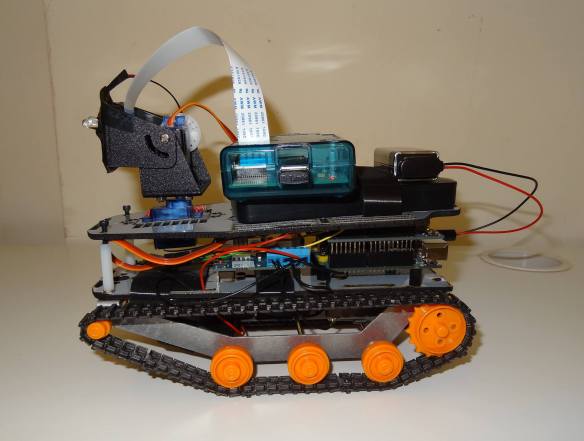
In a previous article (Internet of things), we looked into how to make a Web Controlled Mobile Home Surveillance rover. In this article, we will look into how to optimize the previous rover in every ways possible.

Disadvantages of Rover V1
1) The cost of building the rover was exorbitant. There were many circuits involved which could have been avoided.
2) There was an additional cost involved and this was the power cost. In order to power these circuits, many power supplies were required because every circuit had different voltage and current requirements.
3) Another factor was that the HTML used to control the rover was coded without AJAX which meant every command required whole page load. This caused many requests to the Rover to be skipped as the Wifi shield was not able to handle it and controlling the rover was very difficult.
4) As the eye of the rover was through Raspberry Pi camera and control was through Arduino, the viewfinder and control page were different and hence navigating the rover was difficult.

Advantages of Rover V2

1) The cost of building the rover was brought down as instead of 4 boards (i.e. Arduino UNO, Arduino Wifi shield, Arduino Motor shield and Raspberry Pi), only 2 boards sufficed (i.e. Arduino YUN and Arduino Motor shield).
2) Power cost has been reduced as only 2 boards have to be powered.
3) Controlling the Rover has become very smooth as AJAX requests are very efficient and the YUN handles these very efficiently.
4) The viewfinder and Controls are on the same page using iframes.

Arduino Yun Rover Continue reading

Snake Camera with Raspberry Pi

I love to quote this every time I write an article about Raspberry Pi camera. “Even with the best of camera hardware, we are still slave to its features. Thanks to the raspberry pi camera, we will make a camera do whatever our heart desires.” So I have done it again. The inspiration for the novel use of the camera this time was not so fancy. I had an issue with the toilet leakage and we called the plumber. The plumber was trying very hard to see behind the toilet using his phone flash light but there was not much space. I thought I should help him with my Raspberry Pi camera but the whole unit including the Raspberry Pi is big enough for it to go through to the back. I searched on the Internet for longer ribbon cables and I found one which was 1 meter in length. I procured it and made it into a snake camera. The technical name for a snake camera is borescope. In this article, I will not be giving all the configurations of the borescope but I will guide you to the right resources. As I always say “I am not an innovator, I am an Integrator”, so I will guide you to the resources of the innovators.Raspberry Pi Snake Camera Borescope Continue reading

Web Controlled Table Lamp using Arduino Yun and Yaler

Anyone reading the title will definitely wonder why a Table Lamp would ever need to be switched On or Off via the Internet. Well, until unless there is something so special with a Lamp being On or Off, there is no reason for a Lamp to be controlled via the Internet. The logic here is that if you can control a Lamp over the Internet, why not any other Electrical appliance? You can control your home cooling or heating, you can control home lighting when you are on vacation (to simulate that the house is still occupied), you can check whether you have kept an Iron switched On or not, etc. According to me, the biggest product Arduino has come out with is the Yun. It is like the controller meant for Internet of Things. Just add a relay to it and you can control any Electrical Appliance over the Internet. Continue reading

Control Input Output of Arduino Yun with AJAX

Arduino has gone totally IoT with the Arduino Yun. It has both Wireless and wired connectivity options. IoT doesn’t necessarily mean that it has to deal with Cloud drives, automated inputs, automatic backup to SQL database, etc. It can also mean that your inputs and outputs are user controlled albeit over the Internet. In my previous project, I made a rover which would be controlled by a web interface. Since the webpage was designed such that it would load the whole page depending on each user input (this is how HTML works), many times the http request would timeout as the Arduino was not able to process whole page loads. I had to find out a way in which the web page would not have to change each time I changed the direction of the rover. This is where AJAX comes into picture. What AJAX enables us to do is send a request to the Arduino and get a reply from the Arduino while not requiring a page reload. Since I learn stuff as and when there is a requirement, I scoured the Internet for folks who had already implemented such a thing. The only article on the Internet which dealt with Arduino Yun and AJAX was “Interact and remotely control Arduino YUN with Ajax” by Boris Landoni. Continue reading

Web Controlled Mobile Home Surveillance

This project is very close to my heart as since I was a child, I used to play with electronics. I used to open them up and desired that one day I would be able to understand it and make things like those. I remember making a torch light when I was a little child but since I didn’t know much about switches, my mother remembers that the torch remained on throughout the night until the battery drained away. I was born to be an engineer but when I graduated from engineering, I learnt nothing. Now 10 years after completing my engineering, I got inspired Aragon style “Become whom you are born to be” and I started to reignite my passion for electronics. I put all my expertise of electronics and robotics which I DIDN’T learn in college and came up with this Arduino and Rapberry Pi powered Web Controlled Home surveillance rover. I have burnt a lot of cash on procuring the components as many were not locally available and little less than equivalent amount on the shipping.10498567_699067163464425_3428803516225232023_o Continue reading

Wearable Camera with Raspberry Pi

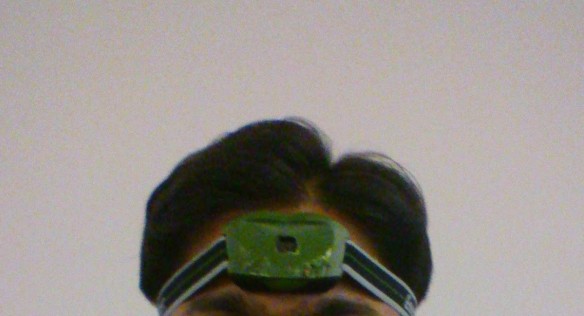
Here I go, I quote it again “Even with the best of camera hardware, we are still slave to its features. Thanks to the raspberry pi camera, we will make a camera do whatever our heart desires.” Recently my friend got a kayak and we have been going out into the sea and the only thing which has been missing in our adventures was a wearable camera to record our adventures. My friend was interested in buying a GoPro and I thought why not make one using Raspberry Pi. The shortcoming with a Pi is the short camera cable which would mean that the whole unit has to be head mounted. So I searched for a longer cable and to my surprise, cables as long as 1m were available. I ordered one of the those and started building the wearable camera. The camera can also be used as an Action camera as it is 90fps capable but the resolution will be limited to 640×480. In this article, I will not be giving all the configurations of the camera but I will guide you to the right resources. As I always say “I am not an innovator, I am an Integrator”, so I will guide you to the resources of the innovators.wearable camera Continue reading